Connect Dutchie to Bookkeep
To begin utilizing Bookkeep's automated journal entries for Dutchie, you must connect your Dutchie store. Follow the step-by-step setup process below to get started.
Step-by-Step Setup Process
1. Get Your Dutchie API Key
Before you can connect Dutchie to Bookkeep, you'll need to obtain an API key from Dutchie. Visit the Dutchie business portal to request your API key:
Once you have your API key, you're ready to connect Dutchie to Bookkeep.
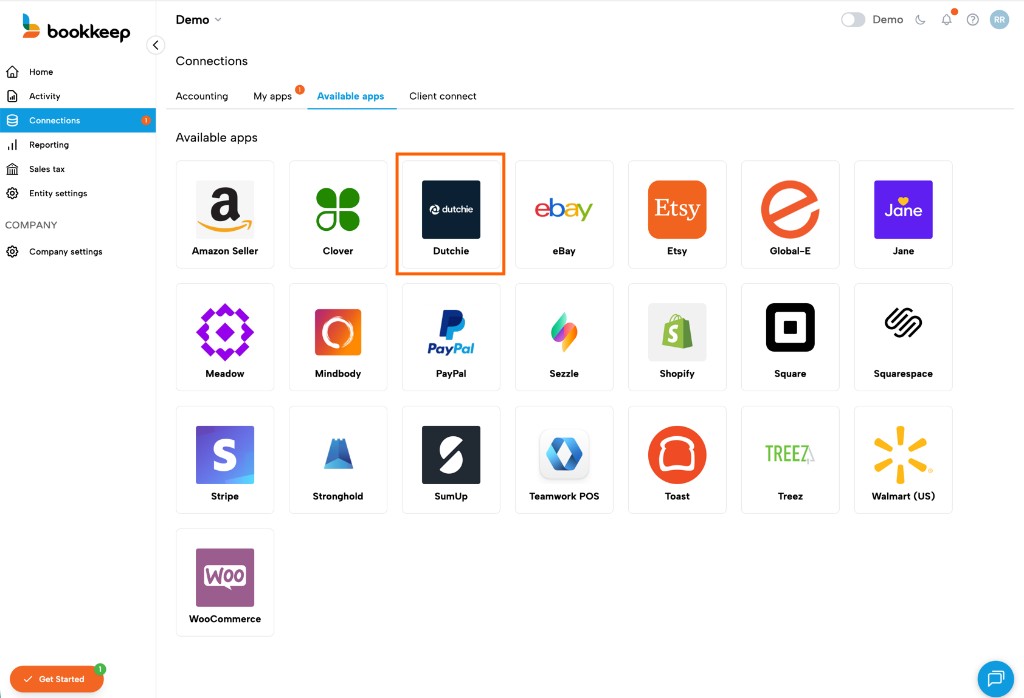
2. Navigate to Available Apps
In Bookkeep, go to the Connections page from the left navigation, then click on the "Available apps" tab. Find and click on Dutchie in the list of available apps:
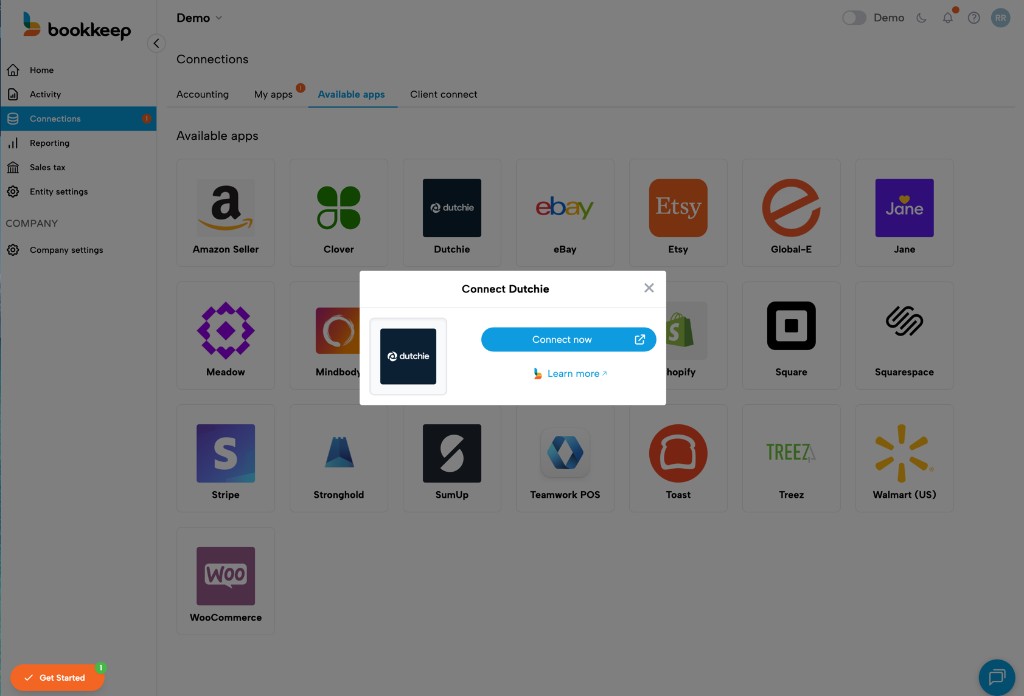
3. Start the Connection
Click "Connect now" to begin the connection process:
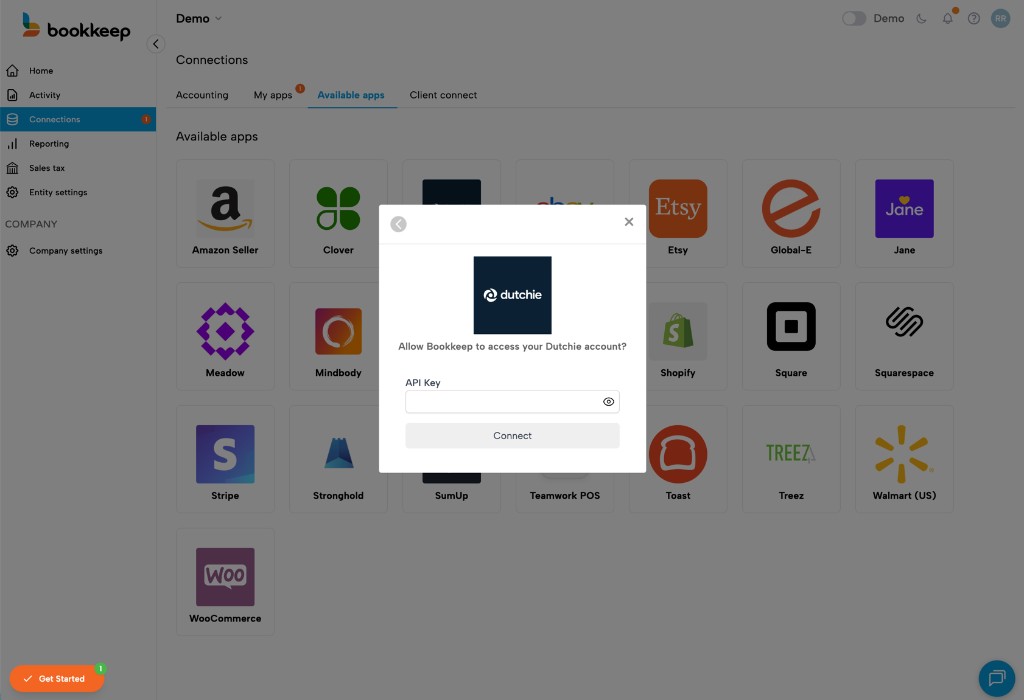
4. Enter Your API Key
A dialog will appear asking you to enter your Dutchie API key. Paste the API key you obtained from Dutchie in step 1, then click "Connect":
5. Confirm Connection
Once connected, you'll see your Dutchie store listed under "My apps" on the Connections page:

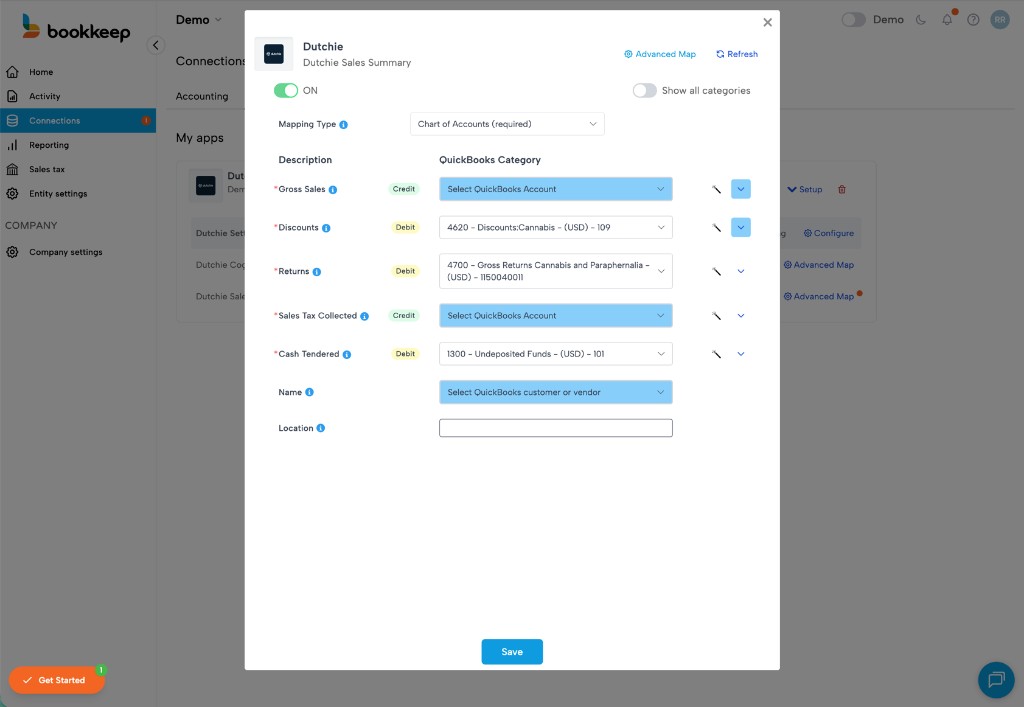
6. Complete Account Mapping
Now that your Dutchie store is connected to Bookkeep, you need to map the journal entry templates to accounts in your accounting platform (e.g., QuickBooks Online).
Click "Setup" to expand the dropdown, then click "Map" for each journal entry template you want to configure. Bookkeep offers two journal entry templates for Dutchie:
Sales Summary Journal Entry
Map the gross sales, discounts, returns, sales tax collected, and cash tendered accounts:
Cogs Journal Entry
Map the cost of goods sold and inventory reduction accounts:
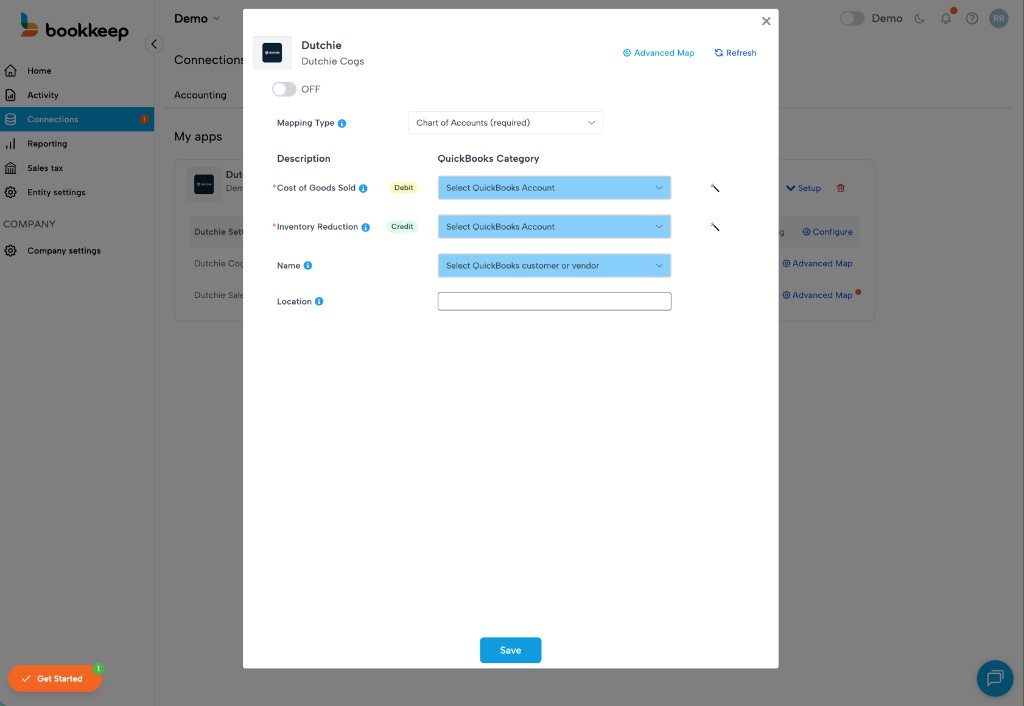
After completing the mappings, toggle each journal entry template to "ON" to activate daily journal entries.
7. Configure Time Zone Settings
Click "Configure" in the dropdown to set the correct time zone and end of day for your connected store:
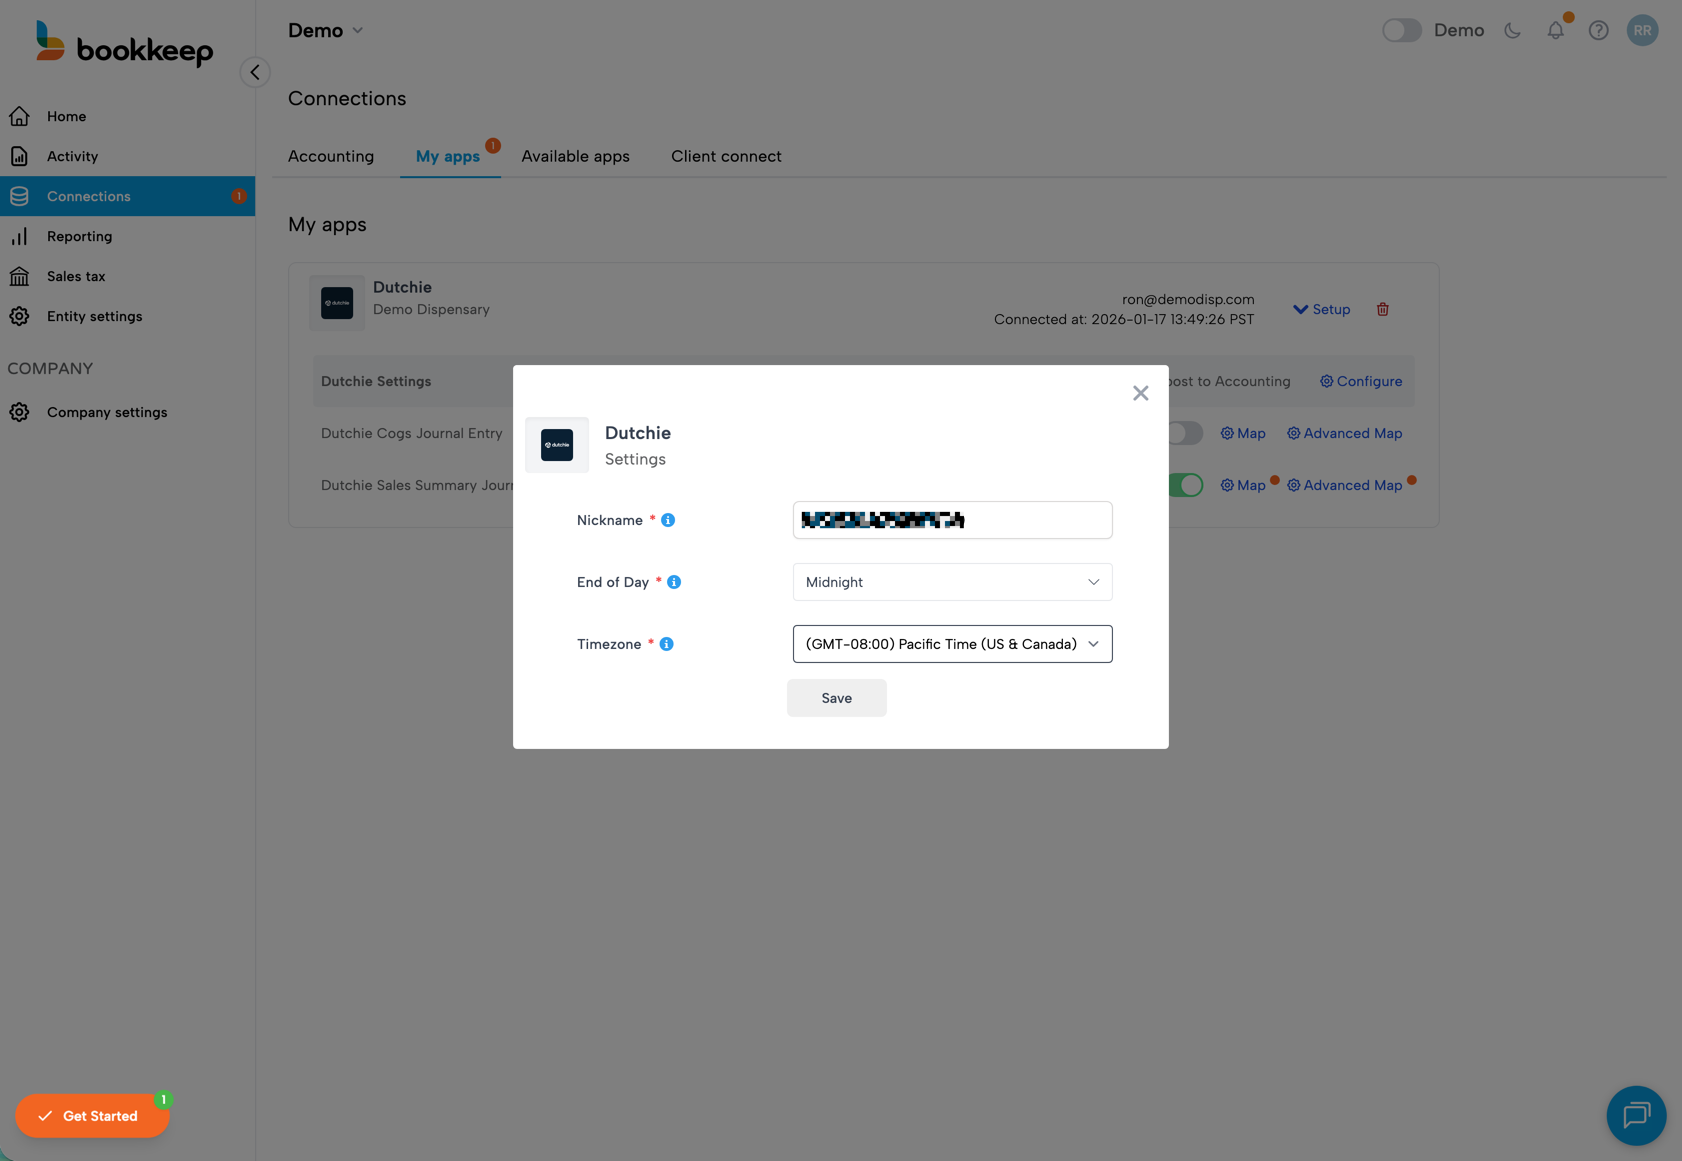
- Nickname: Give your connection a recognizable name (e.g., your store name)
- End of Day: Leave this as "Midnight" to match a standard 24-hour period
- Timezone: Select the timezone that matches your Dutchie store's timezone
The timezone in your Bookkeep settings MUST match the timezone configured in your Dutchie dashboard to ensure all entries are reflected properly in your accounting platform, including beginning and ending balances.
8. Activate Journal Entries
Once you have:
- Mapped both journal entry templates
- Configured your timezone settings
- Set the templates to "ON"
Journal entries will begin posting to your accounting platform the next day!
Please write to support@bookkeep.com if you have any questions.