How to Import Historical Financial Data into Bookkeep
The posting of historical data is only available for accounts with a billing method on file
Bookkeep helps you stay current with your financial data while also giving you the flexibility to import historical data for a complete view of your financial history. By bringing in past transactions, you can catch up on prior periods, clean up your books, and better prepare for tax season. This is especially helpful when migrating older data from source systems like Square or Shopify—whether from last month or several years ago—while allowing you to review and post historical entries with confidence for improved accuracy.
What are Historical Dates?
Bookkeep allows you to import and post historical data from your connected apps to your accounting platform. Historical dates refer to journal entries dated more than 14 days prior to the entity creation date. For example, if you start using Bookkeep on August 15, any entries dated before July 31 (15 days prior) are considered historical entries. These entries can include important financial transactions that occurred before your Bookkeep account was set up, helping provide a more complete view of your financial history.
Cost of Posting Historical Data��
The cost of posting historical entries to your accounting platform is calculated as:
(number of historical postings) × $0.35 USD
Charges will not be applied to previously posted entries or days without sales/transactions/deposits. We will only charge for new postings to your accounting platform.
How Do Historical Dates Work During My 14-Day Free Trial?
During the 14-day free trial, you can use all features except posting historical journal entries (that is, posting to accounting for dates earlier than 14 days before your entity was created).
If you wish to post historical data before your trial ends, you may start paid service early by adding a payment method and activating your Bookkeep subscription.
Why Is It Important to Run Historical Data?
Importing historical data allows you to post your full financial activity from prior periods, helping you clean up your records and get back on track for tax season. Some clients have even imported data spanning multiple years, noting significantly improved accuracy compared to their previous posting methods. This means you can bring in older data from source systems like Square or Shopify—whether from a month ago or up to five years back.
The “Import Dates” button discussed below can be used for more than just importing historical data. Customers can also use this feature to refresh entries in bulk. This functionality is especially important for customers who want to migrate or re-sync updated data from their source apps to their accounting platforms.
How to Import Historical Financial Data in Bookkeep
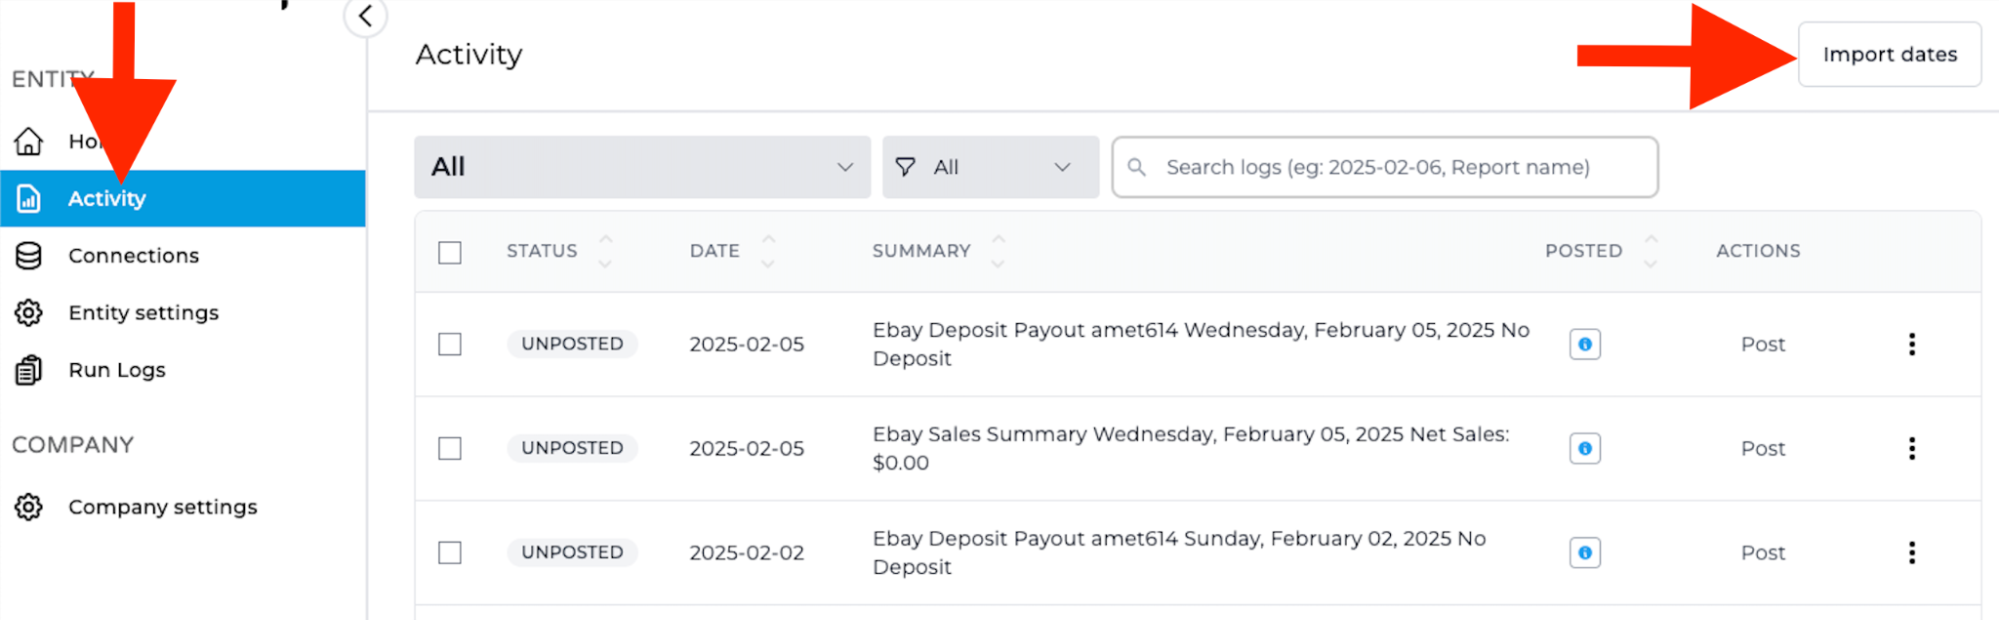
1. Click “Import dates” button on the Activity View
While logged in to the entity you wish to import data, go to "Activity" and click the “Import dates” button. This will open a modal to complete the steps to import financial data.
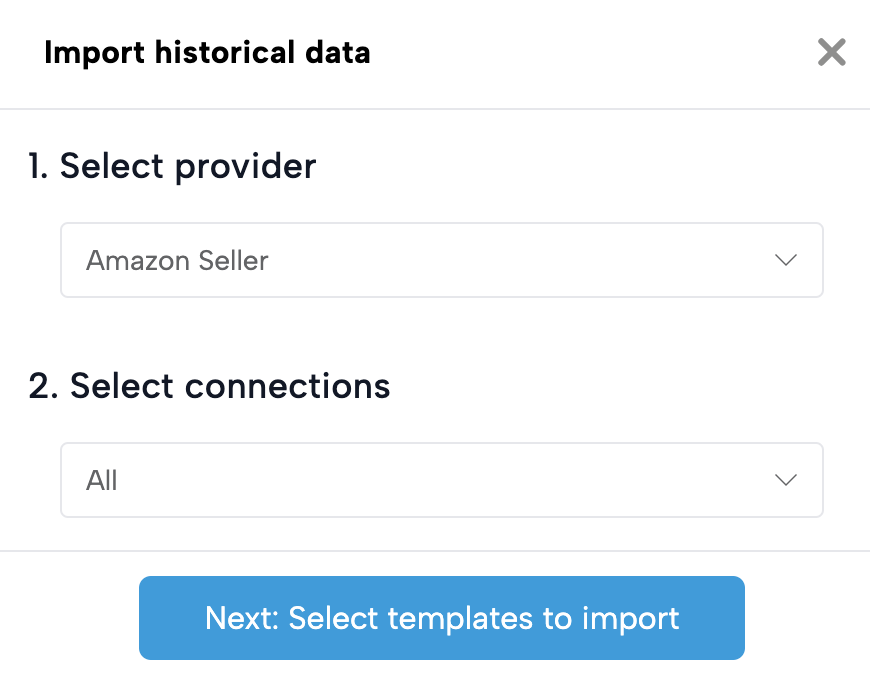
2. Select the app and connection(s) to import from
In the modal, you’ll see a dropdown listing your active app connections. First, select the app (for example, Shopify), then choose one or more specific connections under that app. This allows you to easily import data across multiple connections of the same app at once.
3. Select which financial data should be imported
After selecting an app and its connections, you will see the relevant journal entry data available for import. Check the appropriate boxes for the data you wish to import.
If a journal entry is turned to “OFF” on the Connections view, you will not be able to import that financial data. If you wish to import historical data for a journal entry that is “OFF,” visit the Connections page and turn the respective journal entry to “ON.”

4. Select the desired date range you wish to import
Select your desired date range using the From Date and To Date calendar drop-downs.
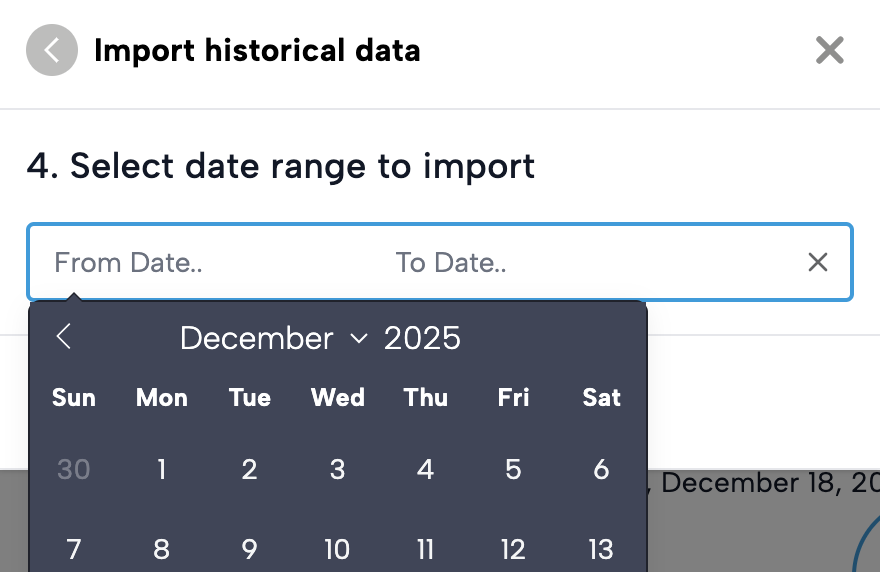
After you have selected the dates to import, click the “Start import” button.
5. Acknowledge the cost per entry
Before importing historical financial data, Bookkeep will ask you to acknowledge the cost per entry. This will be displayed in a pop-up window, as shown below:
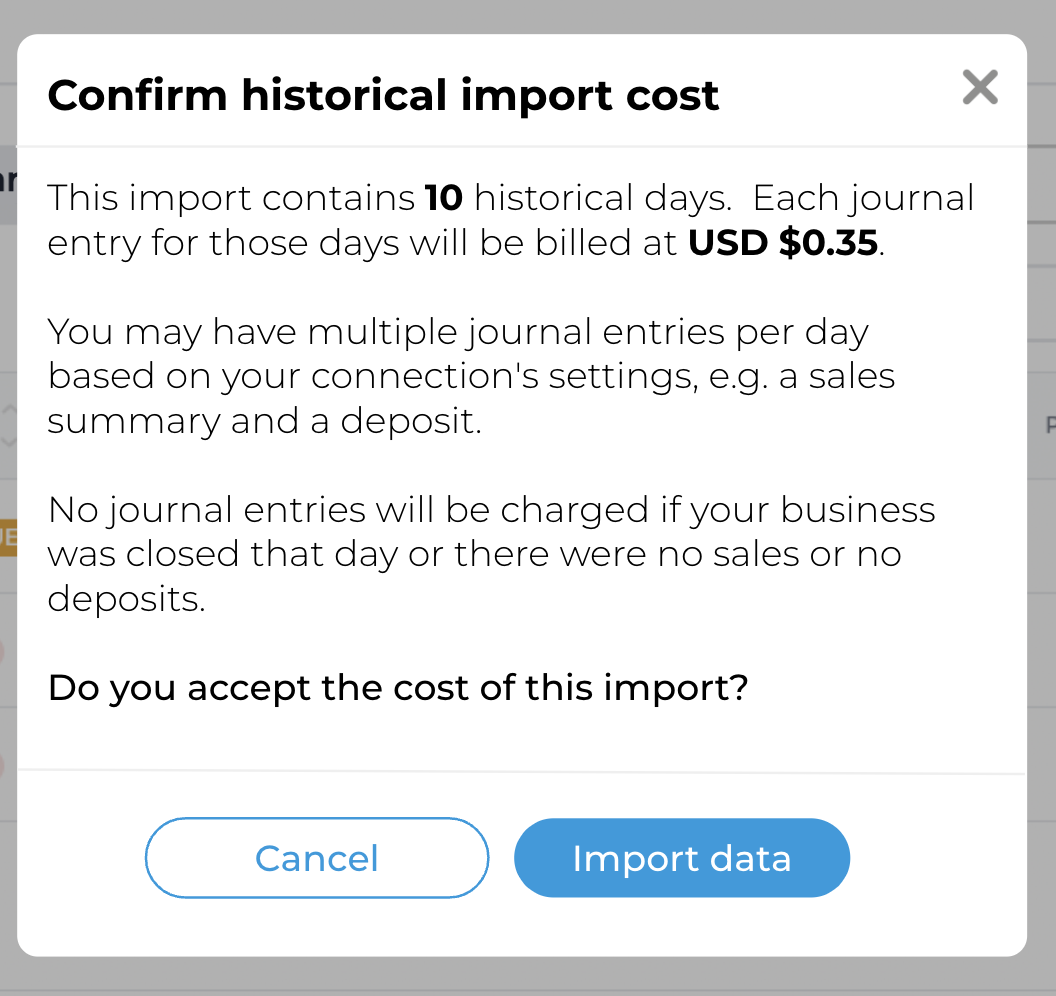
6. Click the blue "Import data" button
Click the blue “Import Data” button to start importing the historical financial data for the specified time frame and journal entries.
Please allow some time for these entries to post to your accounting platform, as larger volumes of financial data may take a while to process.
A job counter in the Activity View will show you how many days remain in the import process.

Currently, you can import a maximum of 365 days at a time from the "Import dates" feature. Simply change the date range and hit "Start import" again if you need to import more than a year.
Understanding what data is being posted and how it is posted is crucial. For example, when processing the Shopify Payouts journal entry, it will generate entries in your bank register intended for bank deposit matching. This can create discrepancies if you have already recorded these deposits from your bank feed in previous periods and reconciled your bank accounts. To avoid issues, it is recommended to first undo all bank deposits for the period being imported, then import the historical data, and finally reconcile by matching the deposits from your bank feed.
It is equally important to understand the significance of maintaining accurate balances and recognizing the “cut-off” date when using our integration. For example, if you begin posting sales and deposits for a specific app (e.g., Shopify) starting January 1, the initial deposits may include earnings from the previous year. Ensuring that all sales and deposits prior to January 1 are recorded will help provide a seamless transition.
If you have any questions, please contact support@bookkeep.com.