Connect Stripe to Bookkeep
To begin utilizing Bookkeep's automated journal entries for Stripe, you must connect the Stripe account from where you would like to import financial data. Below we will go step-by-step through the setup process to ensure you are ready.
Step-by-Step Setup
Step 1. Connect Your Stripe Account
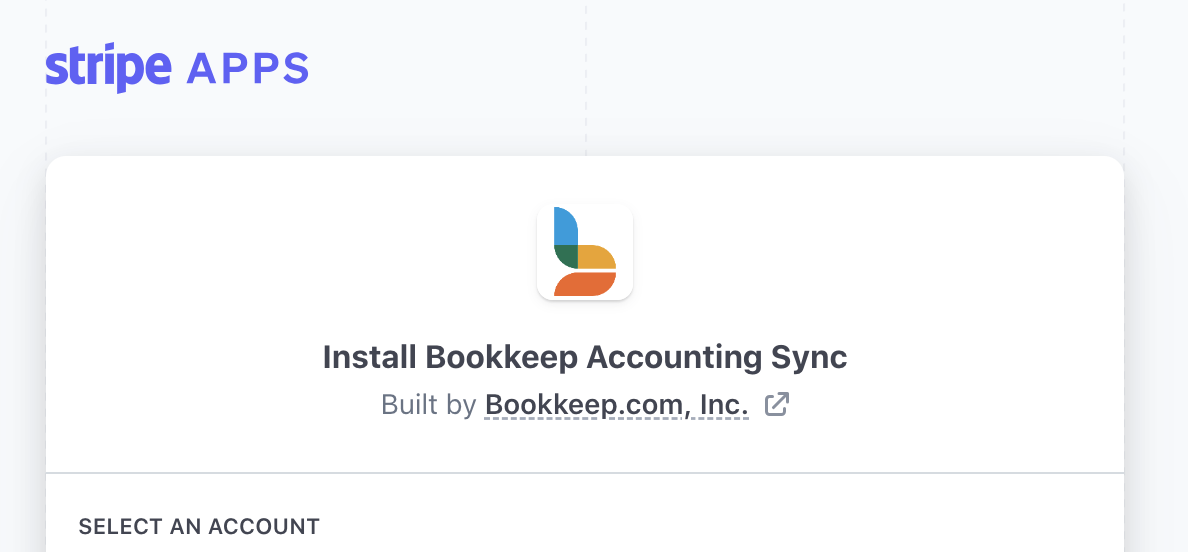
First, connect your Stripe account by visiting the Connections/Available Apps view from the left navigation. Once there, locate Stripe by clicking "Connect an app" to search for Stripe or find it in the directory of available integrations.

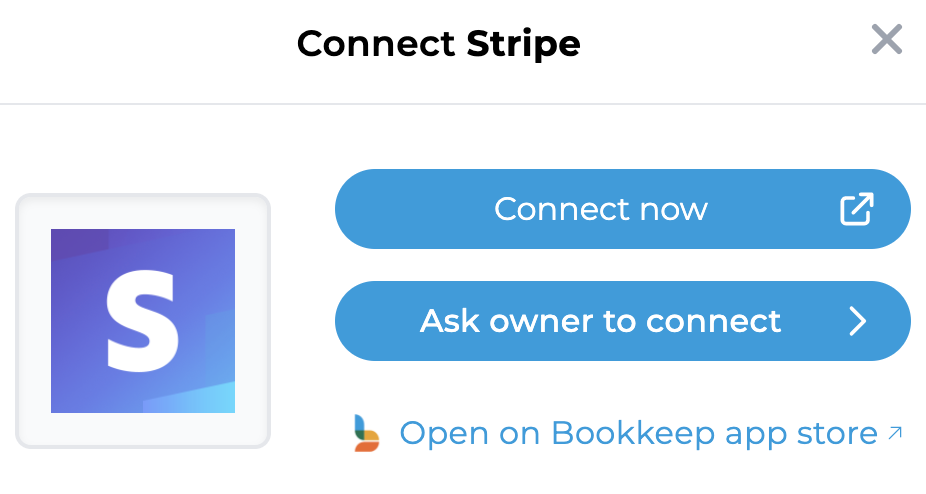
Step 2. Access the Connection Screen
Clicking on Stripe will take you to the connection screen. You can invite the account owner to connect if you do not have the credentials, which will send the owner an email to connect Stripe. Otherwise, if you have admin account credentials, click "Connect Now."
Step 3. Log In and Authorize Access
If you proceed with the "Connect Now," a new window will open for you to log in to your Stripe account. Once logged into Stripe, you can select the account to connect and then grant permission for Bookkeep to read your Stripe data.
Step 4. Confirm the Stripe Connection
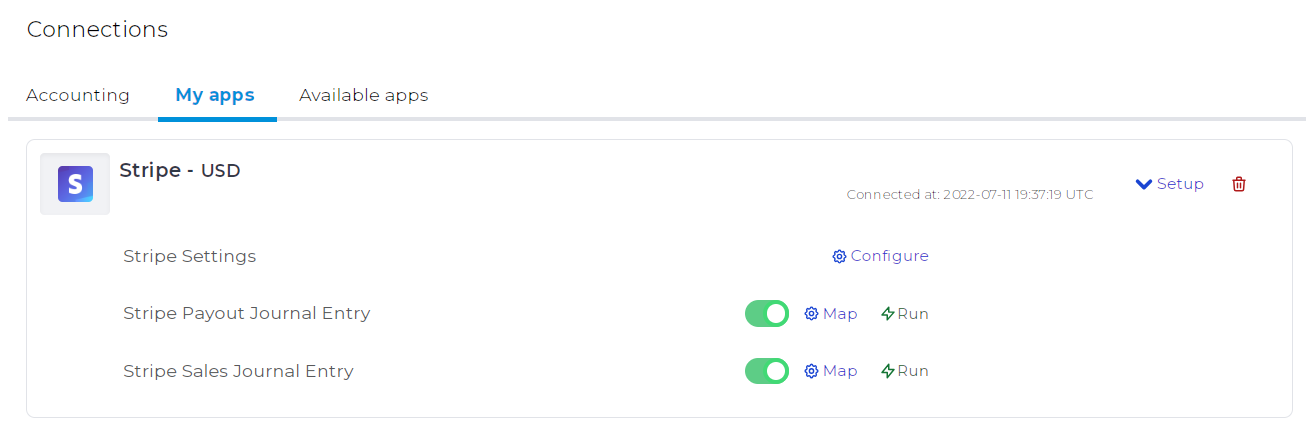
Once you have granted access to Bookkeep, you will see the Stripe account connected to Bookkeep on your "My Apps" tab. Bookkeep will create a separate Stripe connection per account currency that you maintain in Stripe. For most customers, there is one account currency. In the example below, this connection represents the USD Stripe connection.
Step 5. Map Accounts to Your Accounting Platform
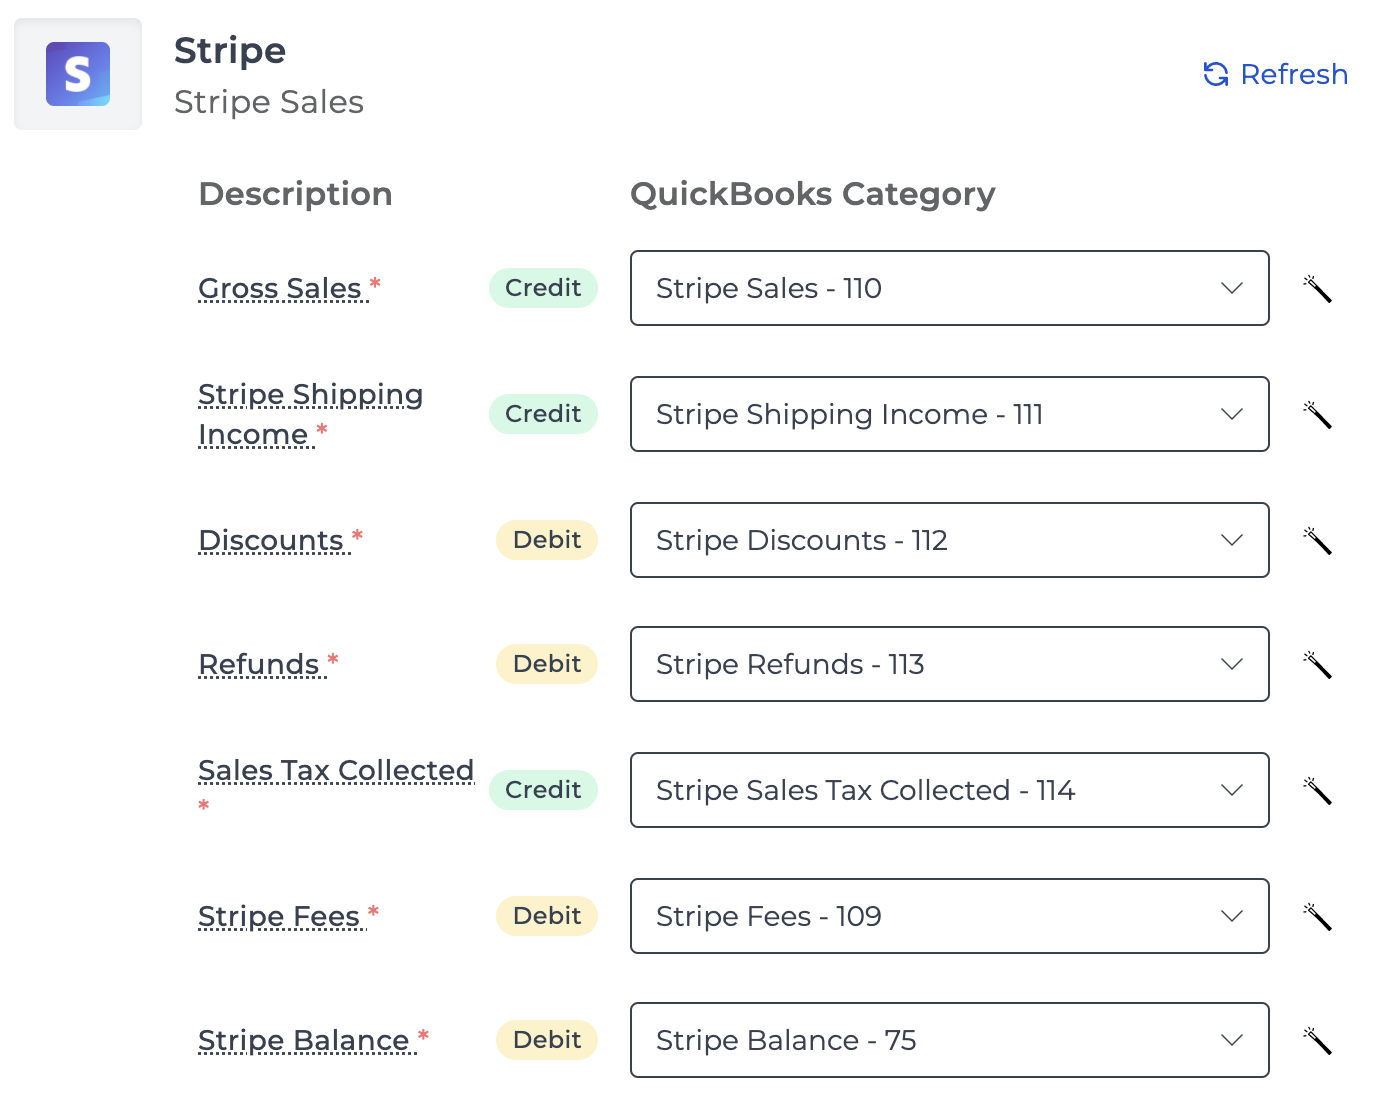
Now that your Stripe account is connected to Bookkeep, you will need to complete your mapping to the accounts from your Accounting Platform (e.g., QuickBooks Online, Xero, Zoho). This can be found on the Connections tab by clicking "Setup" for Stripe, which will expand the dropdown to "Map" the specific journal entries. You can click into each journal entry's mapping and map each journal entry line to enable the posting. Bookkeep offers a daily sales summary entry and a payout/deposit journal entry.
If your sales happen on a different sales platform and you only use Stripe as a payment processor, we recommend using our "intra-clearing account" approach to avoid recording duplicated sales. See this article for more insights.
Step 6. Configure Time Zone Settings
Under the Setup dropdown from the Connections view, click into Stripe Settings to ensure you select the correct time zone and end of day. This should be left at midnight to match the same 24-hour period in Stripe for the connected account. This will impact when we complete the next journal entry and ensure we are retrieving the correct sales, fees, and deposit data for that time period.
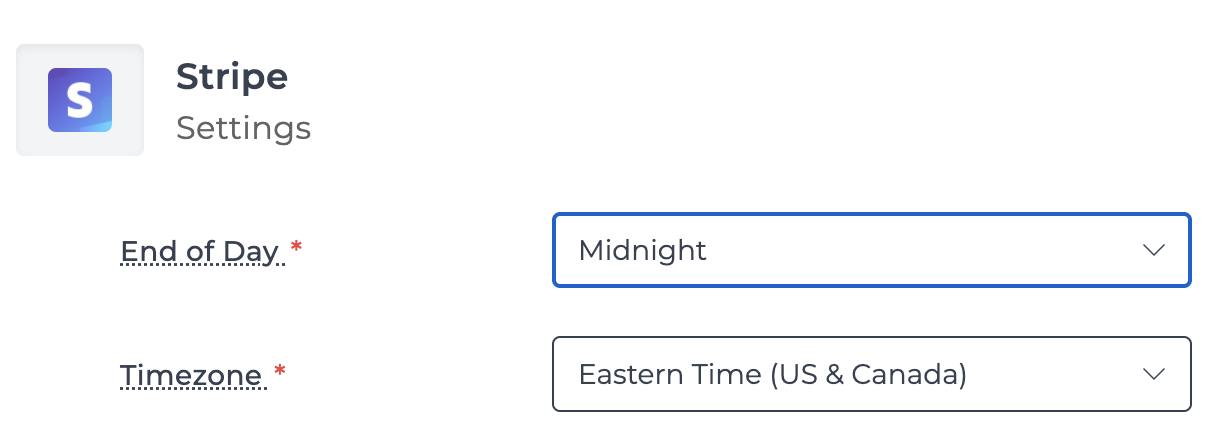
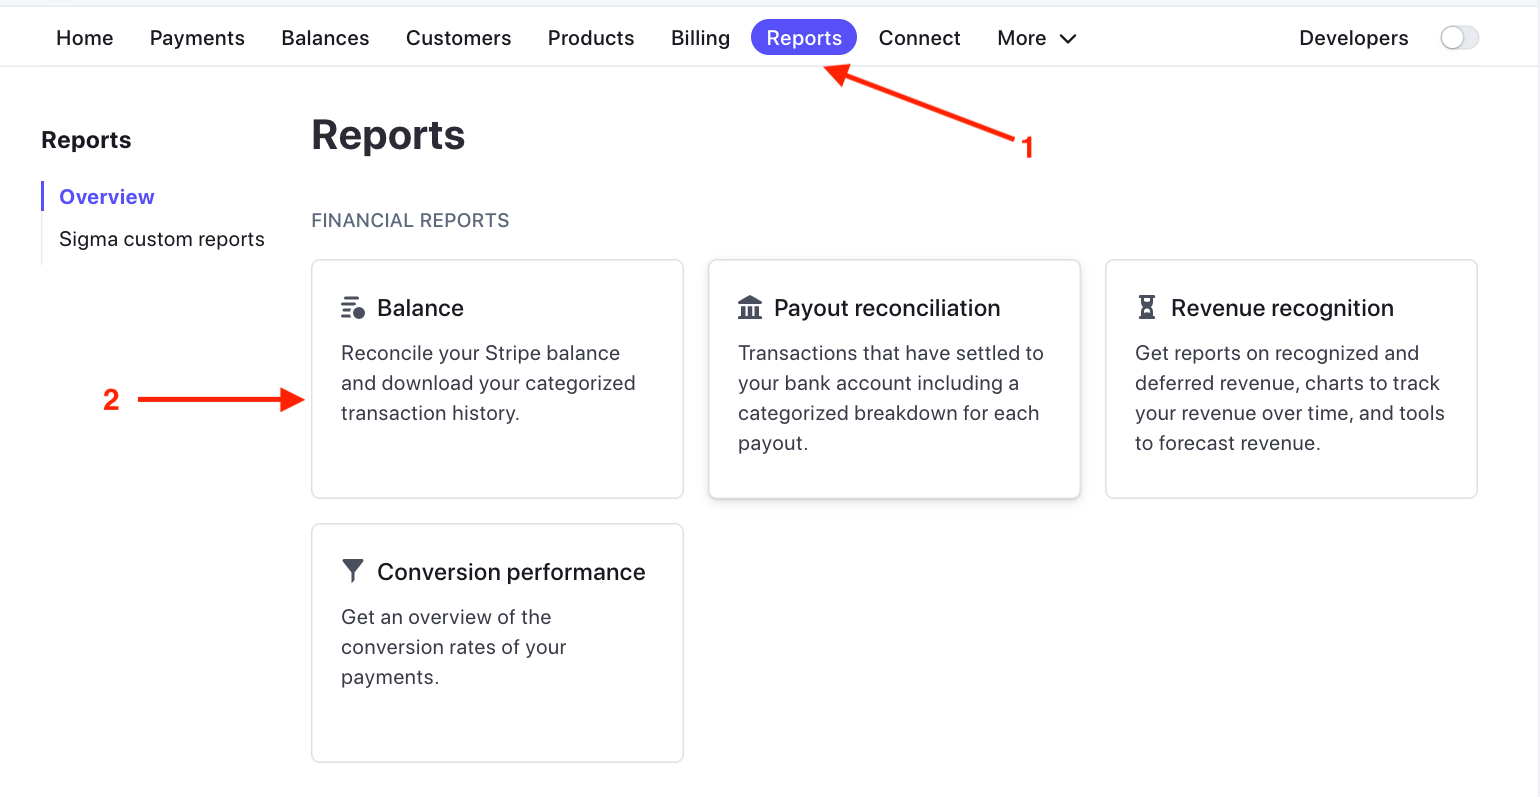
The time zone in your Stripe account settings in Bookkeep MUST be the same as your time zone in the Stripe dashboard, in order to ensure all your entries are reflected properly in your accounting platform, including your beginning and ending balances. To find your timezone settings in the Stripe Dashboard go to "Reports" -> then click "Balance"
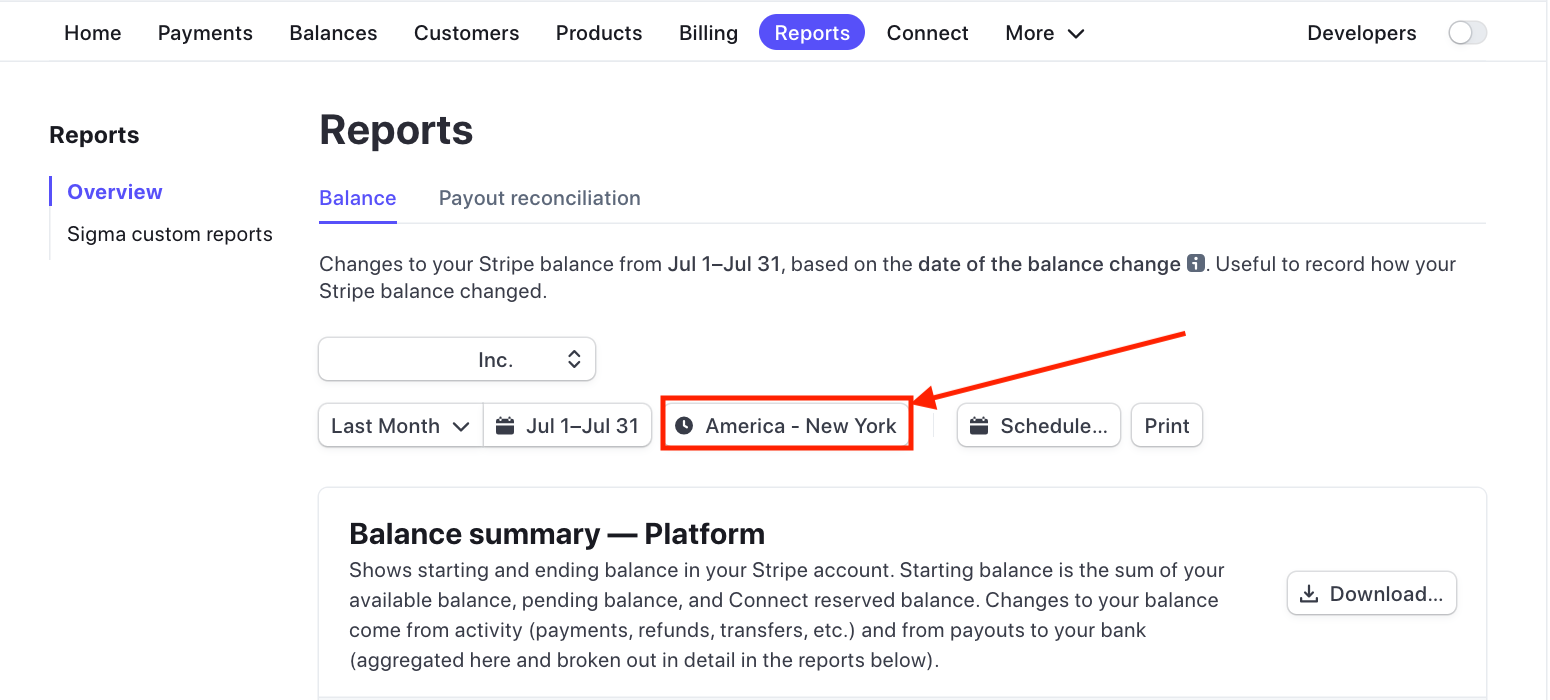
On the next screen, you will see your Stripe timezone that should be used as reference:
Step 7. Activate Journal Entry Templates
Once you have mapped the necessary journal entry templates and set those you want to post daily to ON, you are good to go! You will see journal entries begin posting to your accounting platform the next day.