How to Set Up Shopify with Bookkeep to Automate Accounting
To leverage Bookkeep's automated journal entries for Shopify, the first step is connecting your Shopify store to Bookkeep. The following step-by-step guide walks you through the setup process to ensure your financial data syncs accurately.
Always create your Shopify Connect Intent in Bookkeep before installing the Bookkeep app from the Shopify App Store. The Connect Intent tells Bookkeep which entity the store belongs to, so the store attaches to the right place as soon as the app is installed, no matter who performs the install.
The only exception: if you don't have a Bookkeep account yet, you can install directly from the Shopify App Store and create your new Bookkeep account as part of the Shopify onboarding. See New to Bookkeep? Start from the Shopify App Store below.
1. Add the Shopify App in Bookkeep
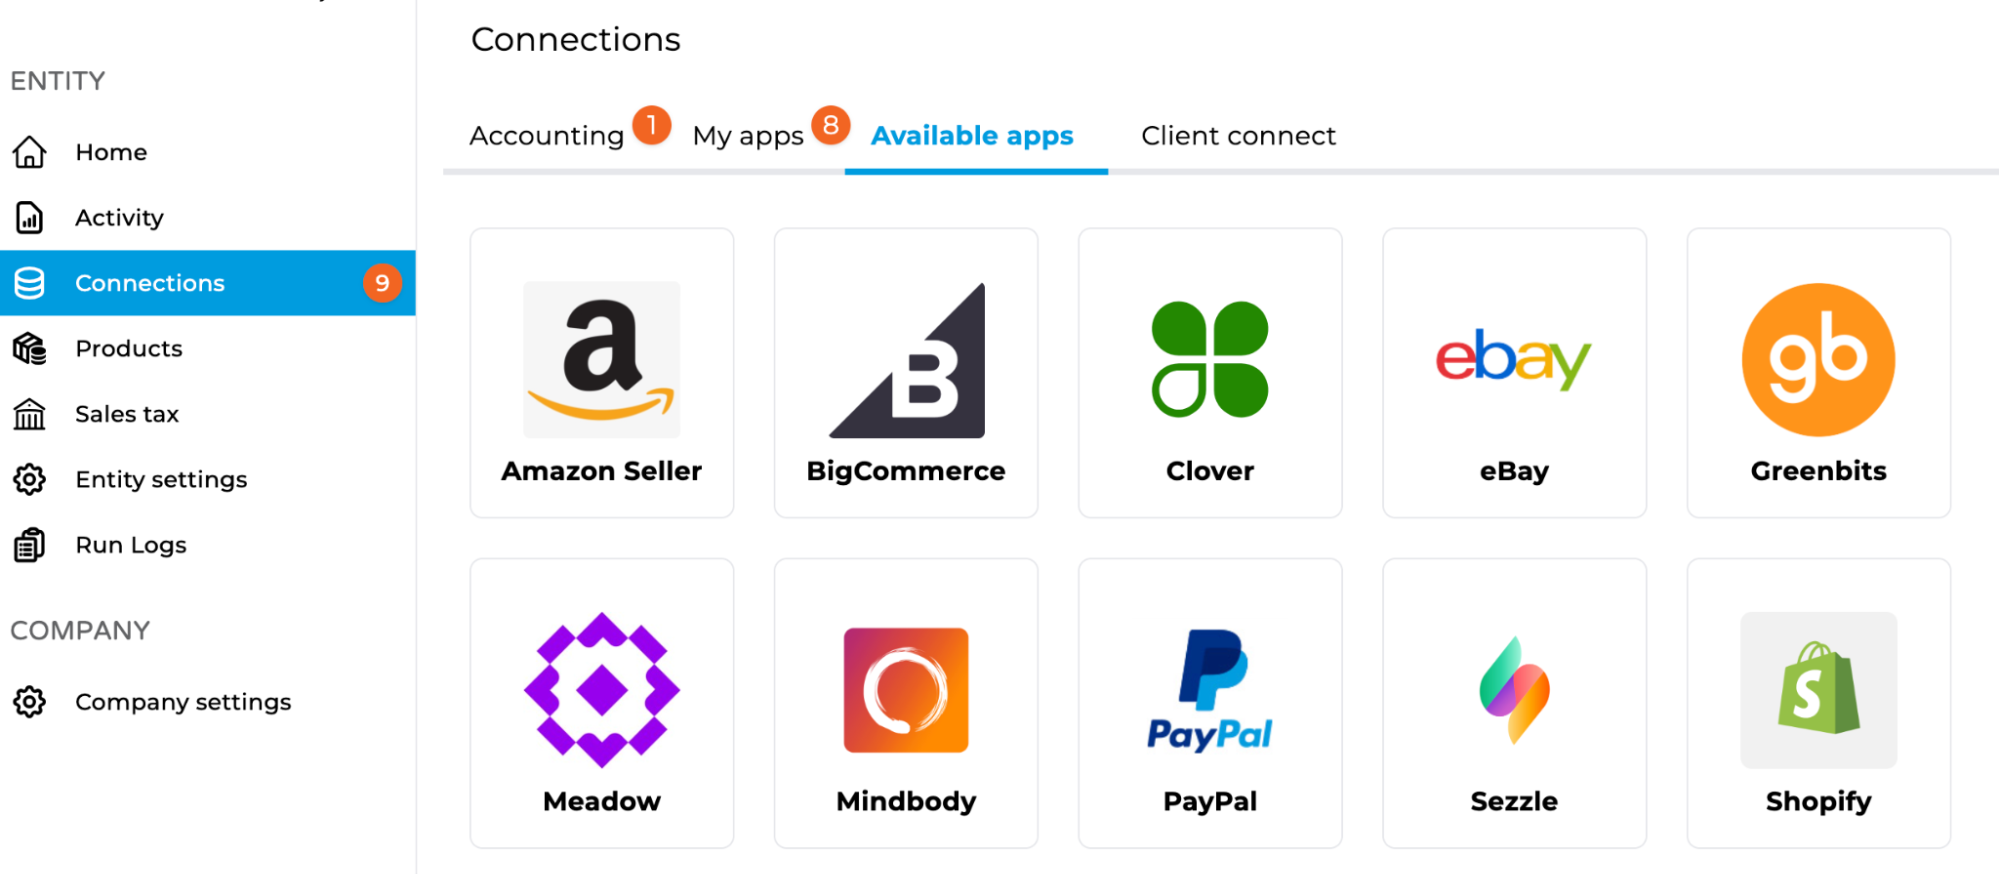
Navigate to Connections → Available Apps and locate the Shopify icon. Click the icon to open the Connect Shopify modal.
2. Create Your Shopify Connect Intent
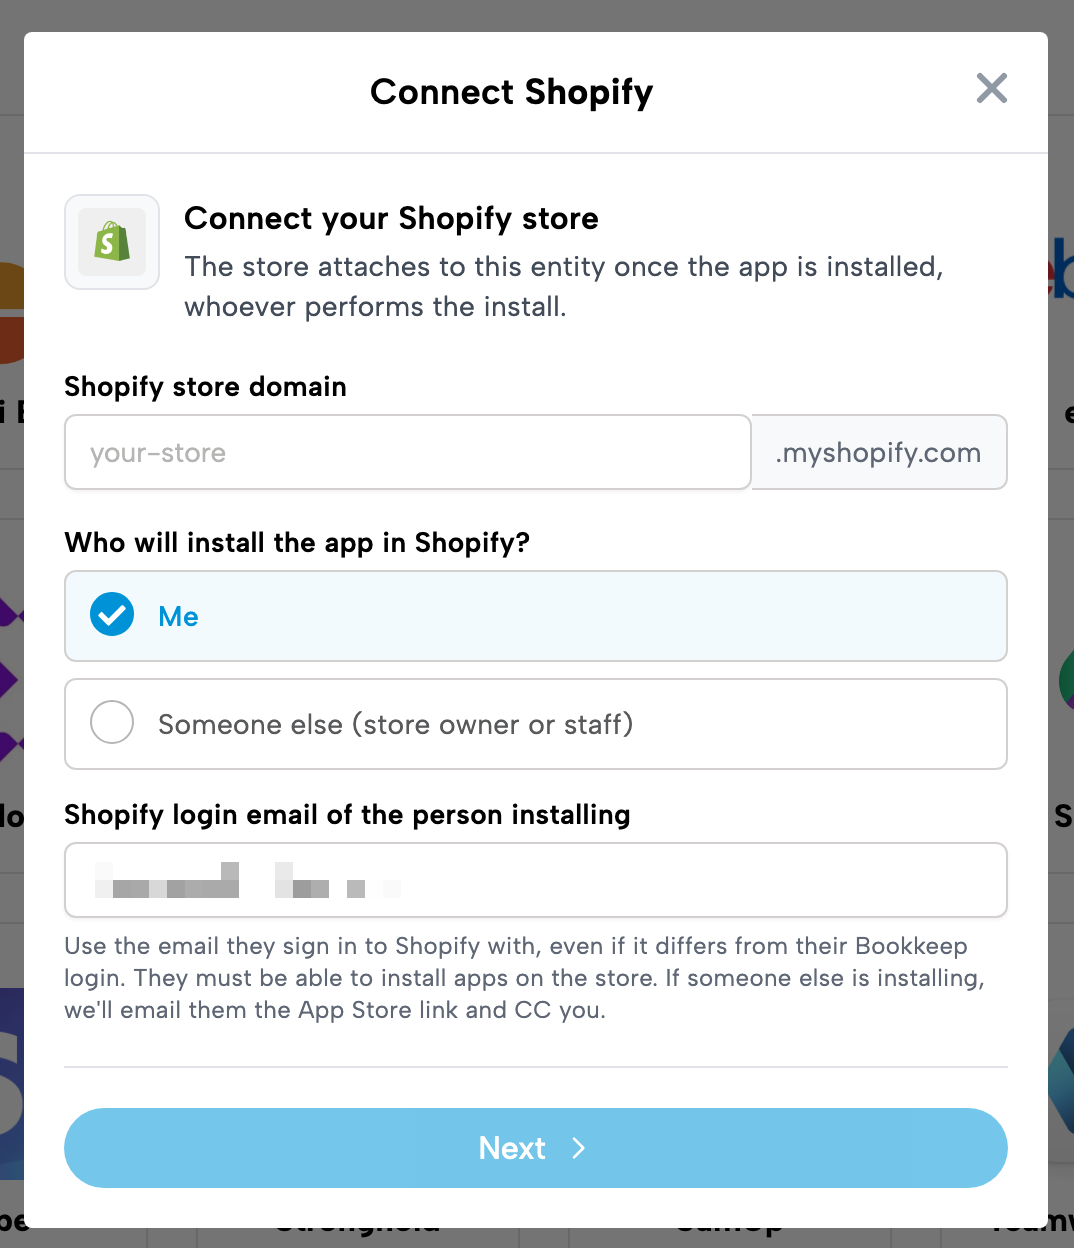
The Connect Shopify modal creates the Connect Intent for the entity you are working in. Fill in:
- Shopify store domain: your store's
your-store.myshopify.comname. - Who will install the app in Shopify?
- Me: you will install the app yourself.
- Someone else (store owner or staff): when you click Next, Bookkeep sends that person an email asking them to connect the store, with a link to the Bookkeep listing in the Shopify App Store. You are CC'd on the email so the store owner can see who the request came from.
- Shopify login email of the person installing: the email they sign in to Shopify with, even if it differs from their Bookkeep login. That person must be able to install apps on the store.
Click Next to save the Connect Intent and continue to the Shopify App Store.
You don't need access to your client's Shopify store to connect it. Choose Someone else, enter your client's Shopify login email, and click Next. Your client gets an email asking them to connect, with you CC'd so it's clear the request came from you. When they install from the link, the store attaches to the entity you set up.
3. Install via the Shopify App Store
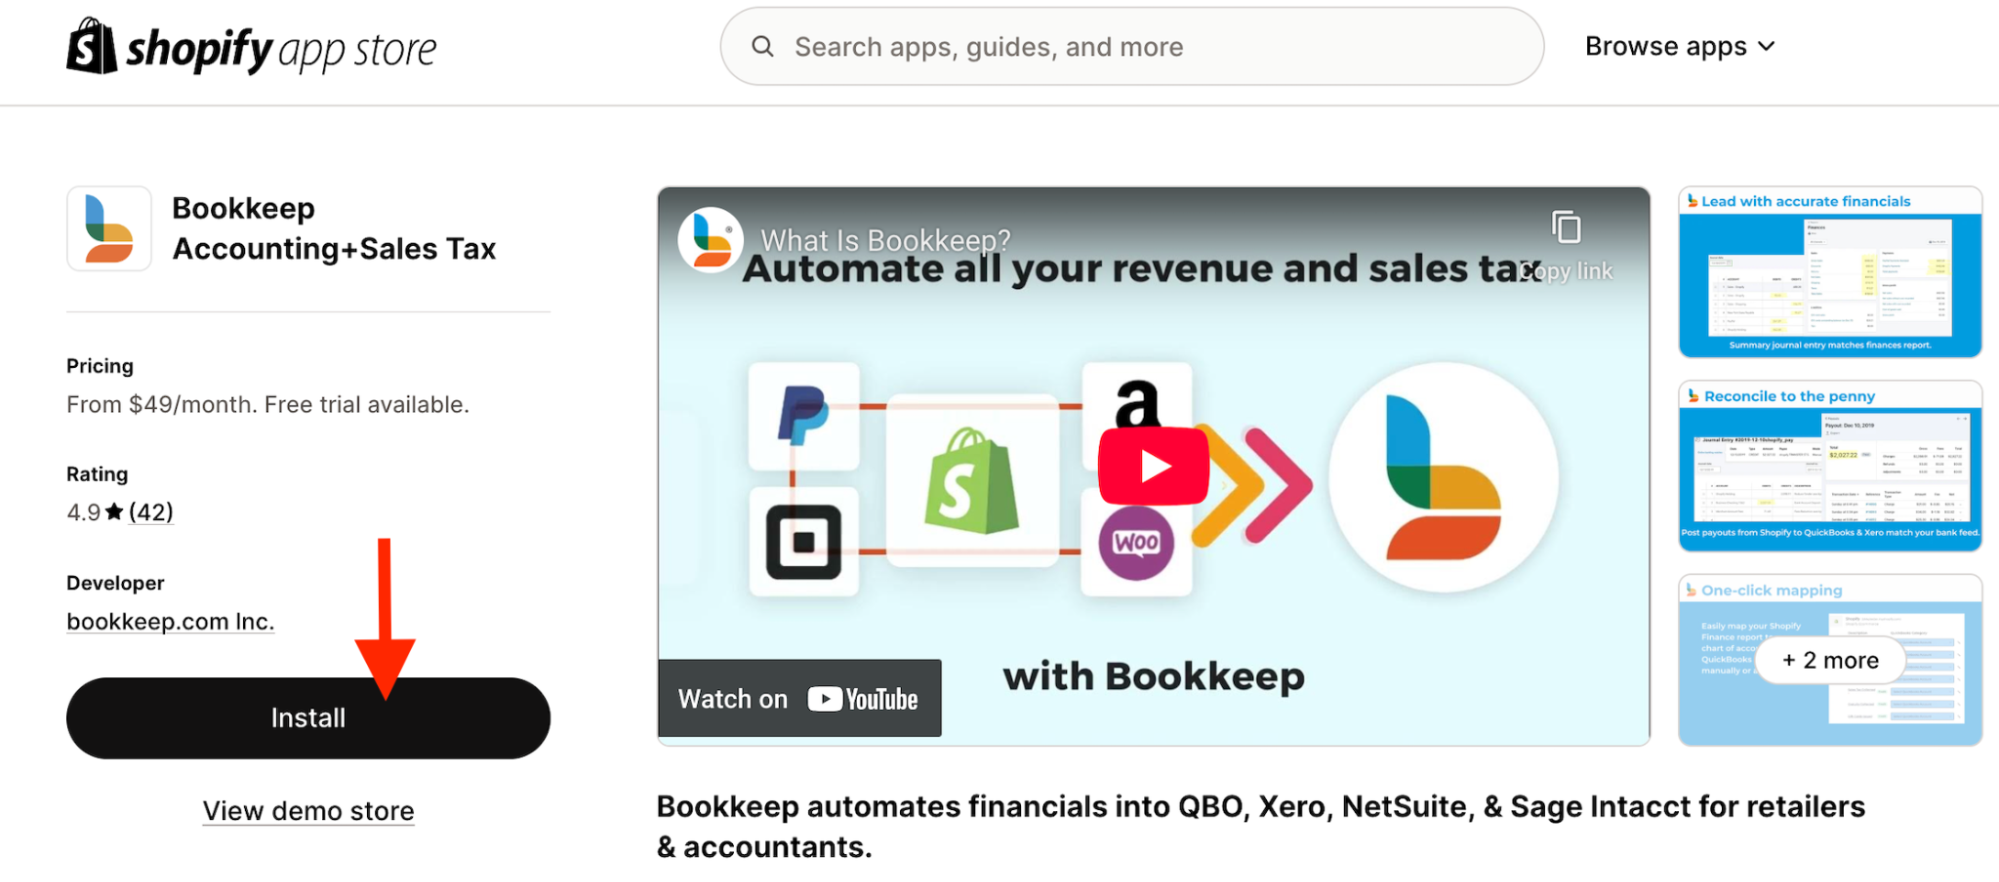
The Bookkeep app listing opens in the Shopify App Store: https://apps.shopify.com/bookkeep-com-daily-summary-e-commerce. Click Install (you must be logged into Shopify to complete the installation).
If you chose Someone else, the person you named opens the App Store link in their connect email and completes Steps 3 and 4 themselves. The store still attaches to your entity when they finish.
4. Approve App Permissions
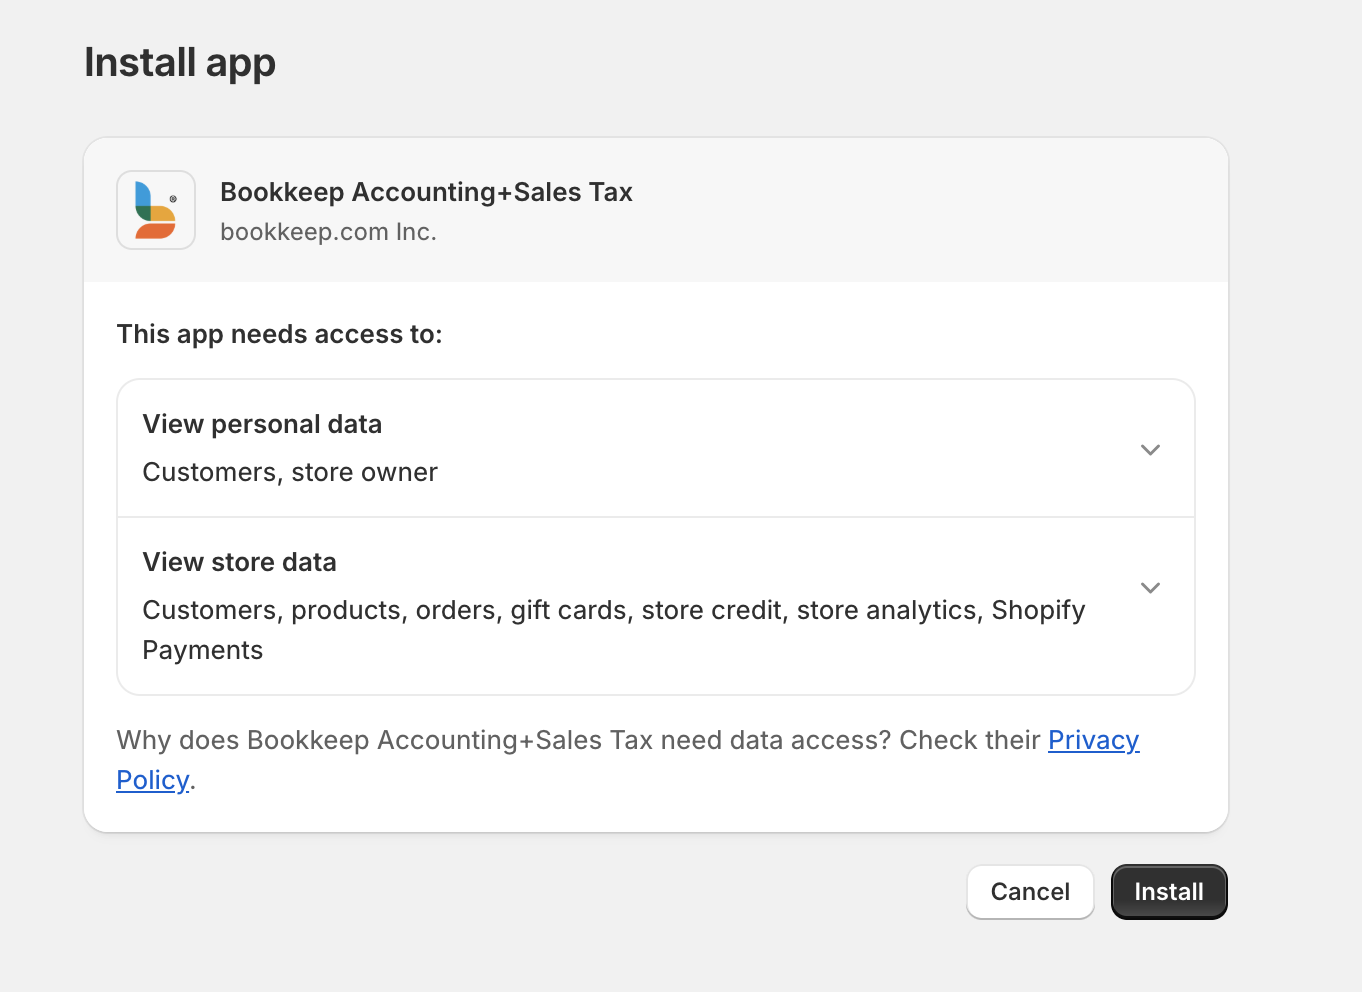
After clicking Install, Shopify will prompt you to approve permissions for Bookkeep to sync your financial data. Click Install again on this page to confirm.
5. Store Attaches to Your Entity
Because you created the Connect Intent first, the store attaches to the entity you started from once the install completes. You don't need to match emails or pick an entity inside Shopify.
6. Launch Bookkeep to Confirm Connection
Once the installation is complete in Shopify, you’ll be redirected to Bookkeep’s Shopify app (still within the Shopify interface). If you prefer to continue the setup directly in Bookkeep, simply go to app.bookkeep.com.
Your connected Shopify app will also appear under Connections → My Apps in Bookkeep.
7. Map Shopify Data to Your Accounting Platform
With the connection complete, you can now map Shopify data to your accounting platform (e.g., QuickBooks Online).
-
Navigate to your Shopify connection and click Setup → Map.
-
Mapping ensures financial data from Shopify is recorded accurately in your accounting system.
Pro Tip: Mapping requires a connected accounting platform before proceeding.
By setting up this mapping correctly, you can ensure that your financial data is accurately recorded and categorized in your accounting system, providing you with clear and organized financial records for your business.
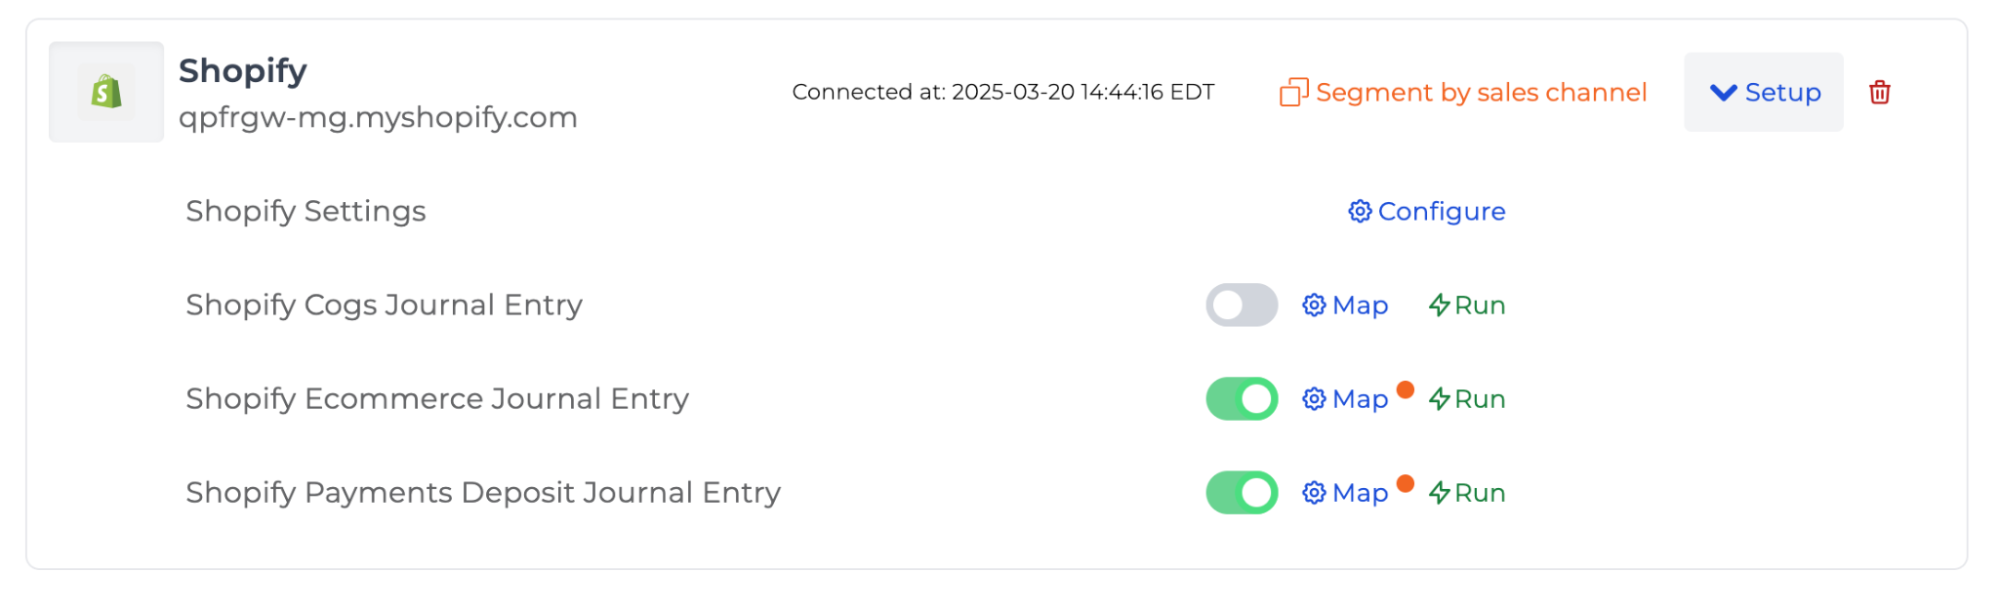
A unique feature Bookkeep offers for Shopify is Segmenting, which you can activate by clicking “Segment by sales channel” (as shown above). When enabled, Bookkeep scans your Shopify store for sales channels, apps, and POS locations, allowing you to group or separate data for consolidated or detailed reporting within your accounting platform.
8. Segment by Sales Channel (Optional)
This step is relevant for those who clicked "Segment by sales channel" in the step above: Segmenting is not required and is an optional feature which enables advanced reporting and grouping of sales channels, apps or POS locations.
Some customers use Segmenting to group or separate their various Shopify channels into individual journal entries for COGS and sales. However, if you choose not to segment your journal entries by channel, you can skip selecting “Segment by sales channel” and continue with the mapping process described below in Step 9.
You can repeat the Segmenting process as often as needed if you have additional channels you want to post separately. Once you choose to “Segment by sales channel,” you’ll see the following journal entry options appear:
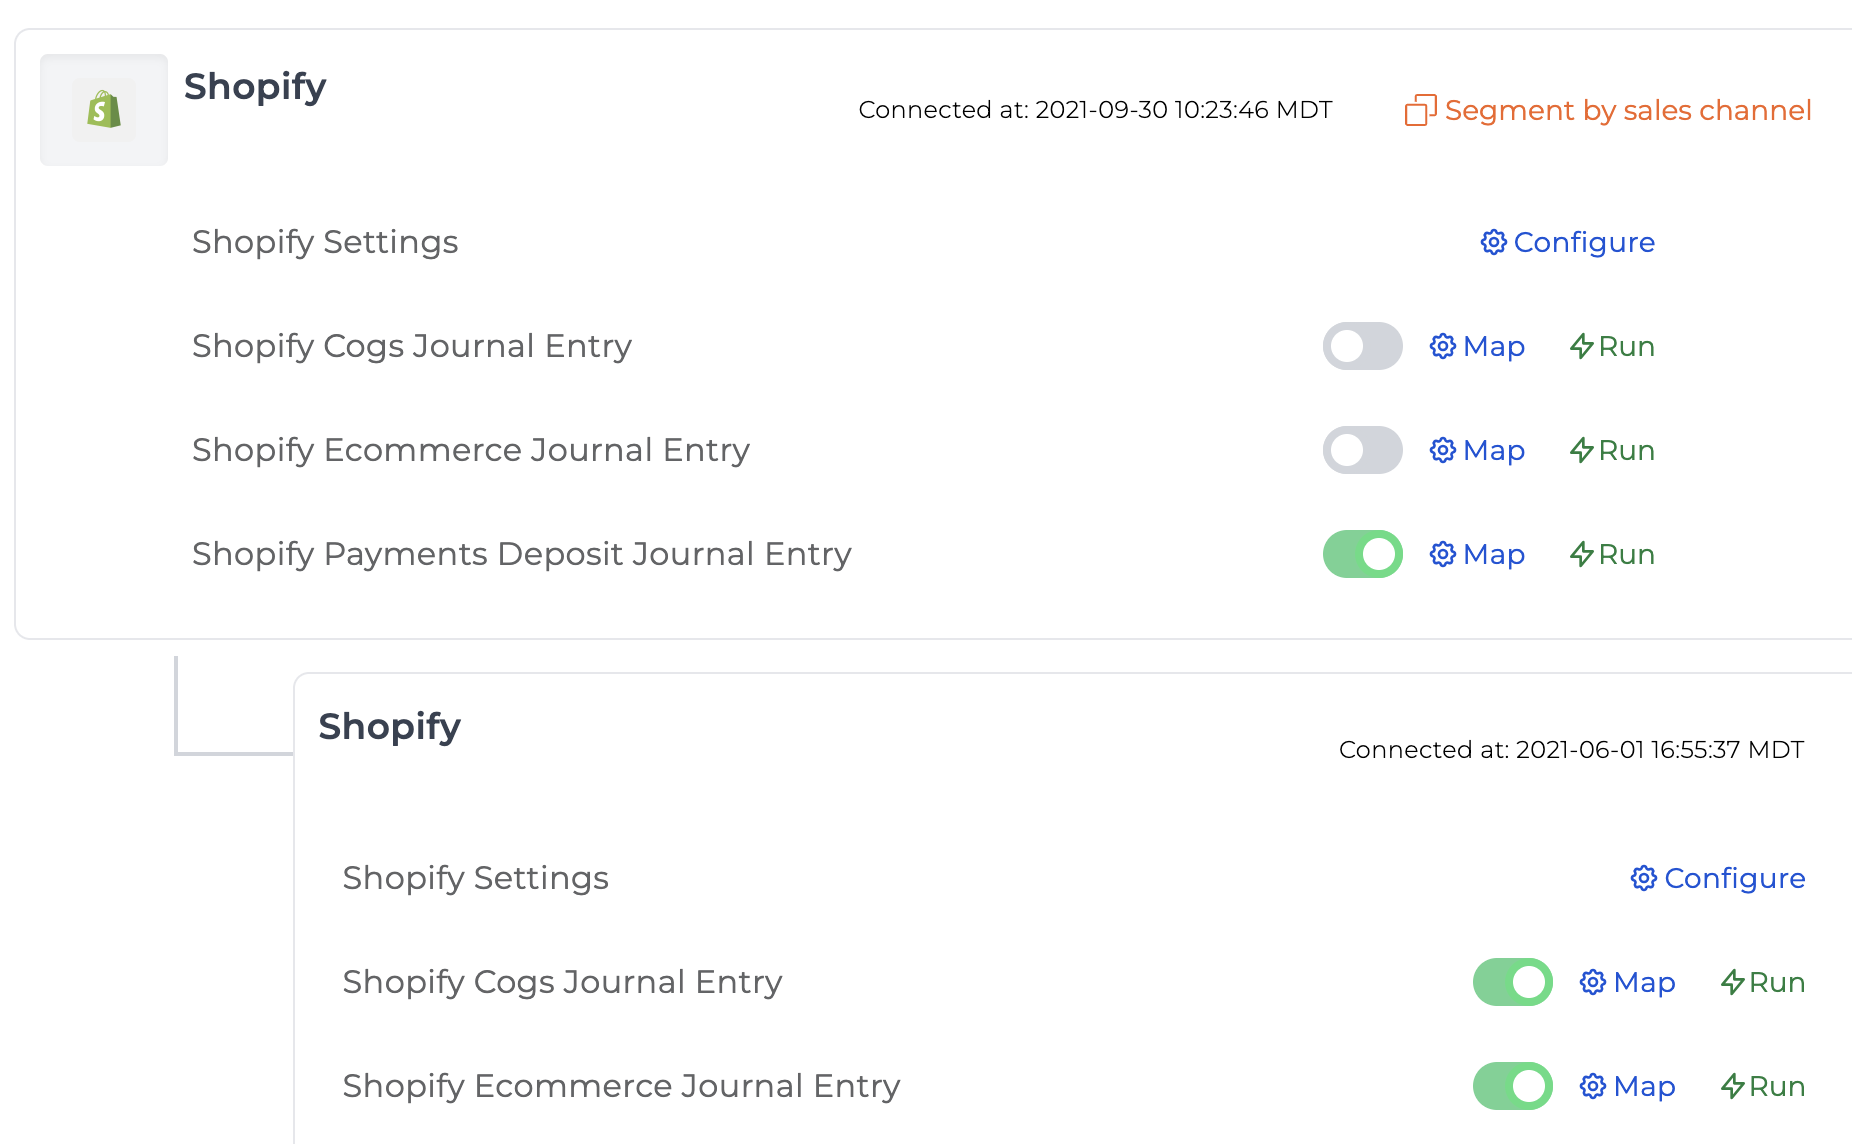
A note on Shopify segments: The image above highlights an important distinction — the lower segment displays only ecommerce and COGS journal entry options, while the parent segment at the top includes ecommerce, payments deposit, and COGS journal entries. This difference exists because the Segmenting feature allows you to separate specific channels into individual journal entries for sales and cost of goods sold only. Since Shopify payouts are not channel-specific, they are mapped once at the parent level.
9. Configure and Map Journal Entries
-
Configure each journal entry mapping by clicking Map.
-
Select the accounts in your accounting platform to receive Shopify financial data.
-
Turn the journal entry ON (green slider) to begin posting automatically. Gray indicates OFF. This will begin posting daily journal entries starting the next day.
You can repeat this process for all of journal entries if you plan to use them. Learn more about the various journal entries.
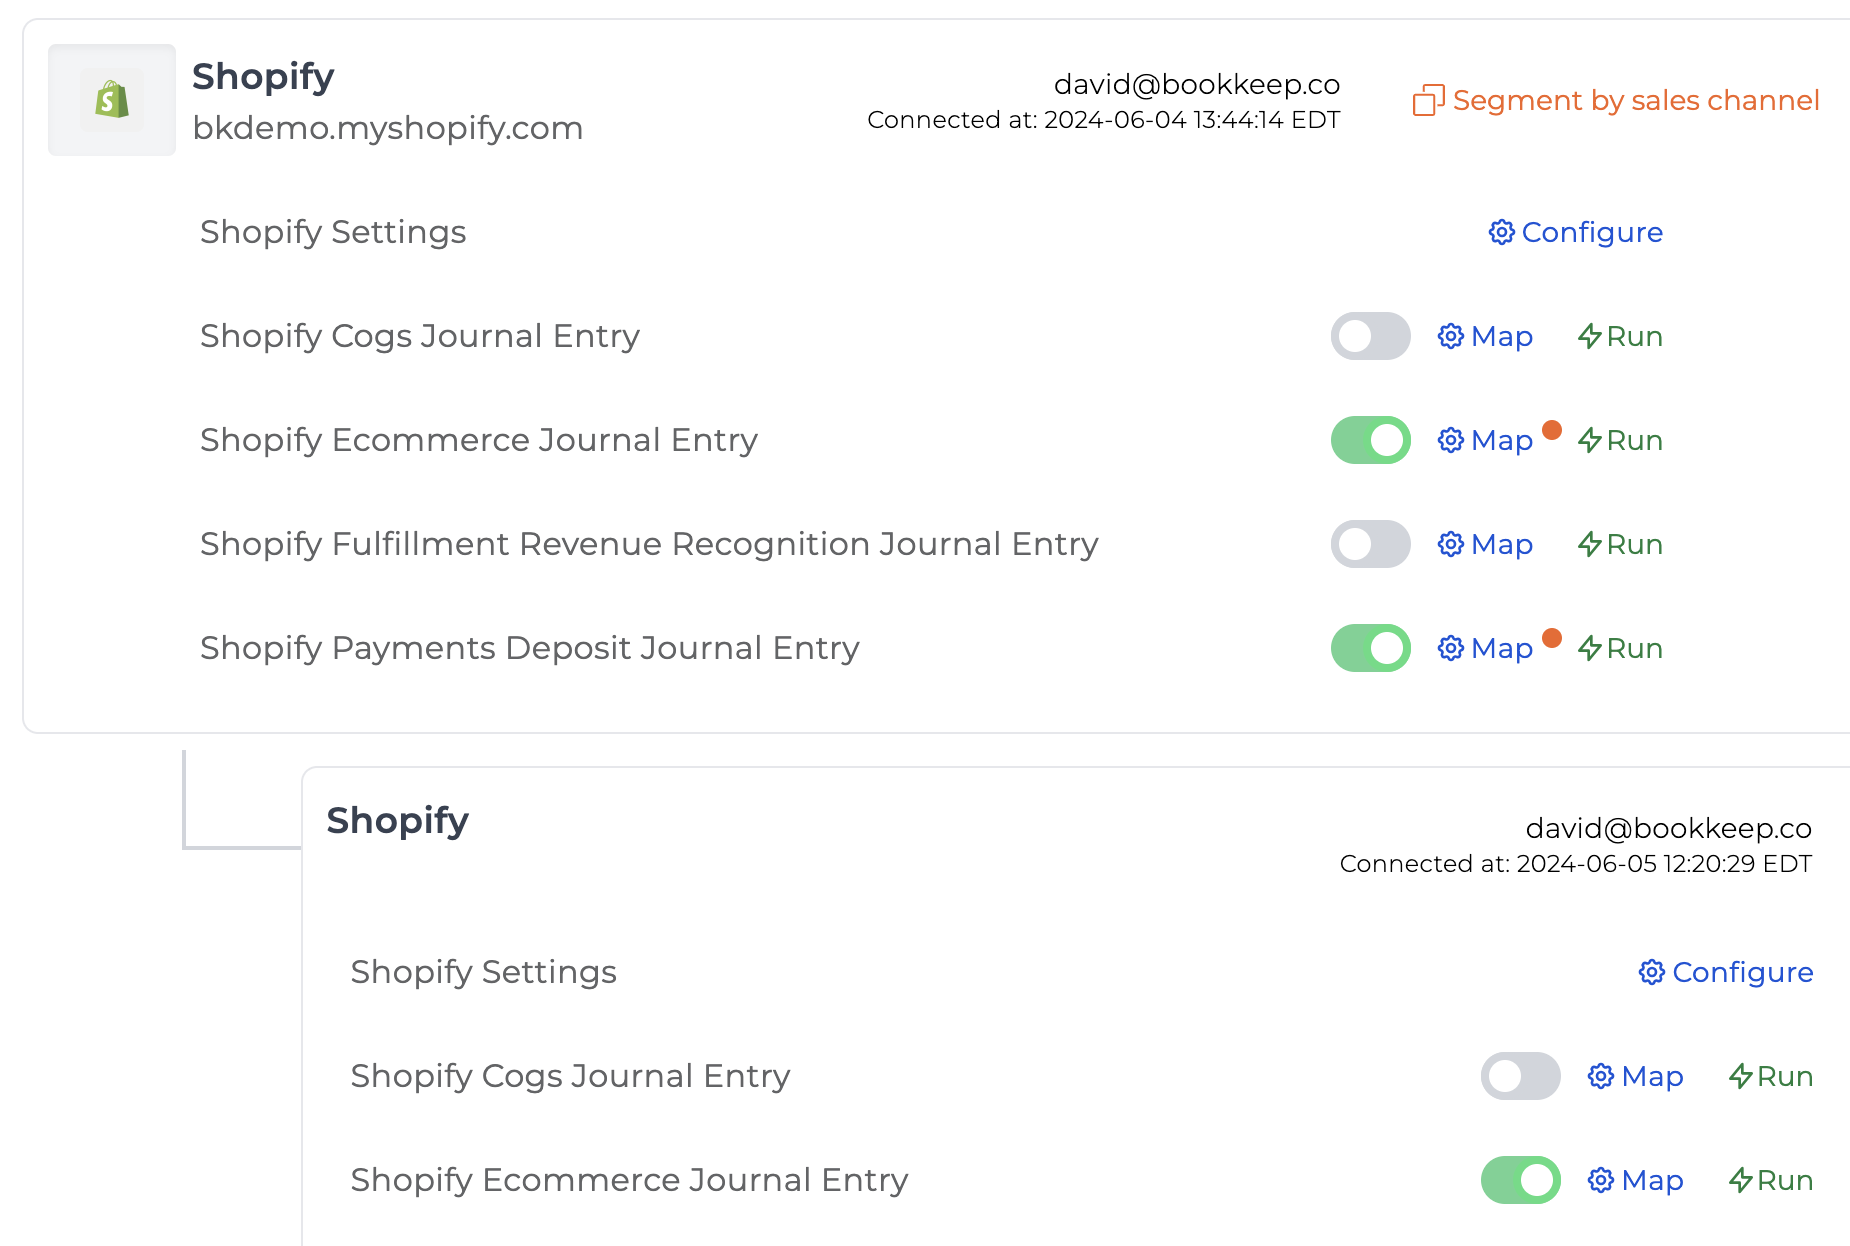
As shown in the image below, I’ve used “Segment by sales channel” to break out specific Shopify channels into their own journal entries. Note that the ecommerce option is turned ON for both the parent and the segmented channel. This configuration ensures that one journal entry is posted for the specific channels included in the segment, while any channels not included post through the parent-level mapping—preventing data duplication. The payments deposit is also activated at the parent level, since deposits are not channel-specific. Additionally, the COGS journal entry remains OFF for both the parent and segmented channels.
10. Filter by Channel (If Using Segments)
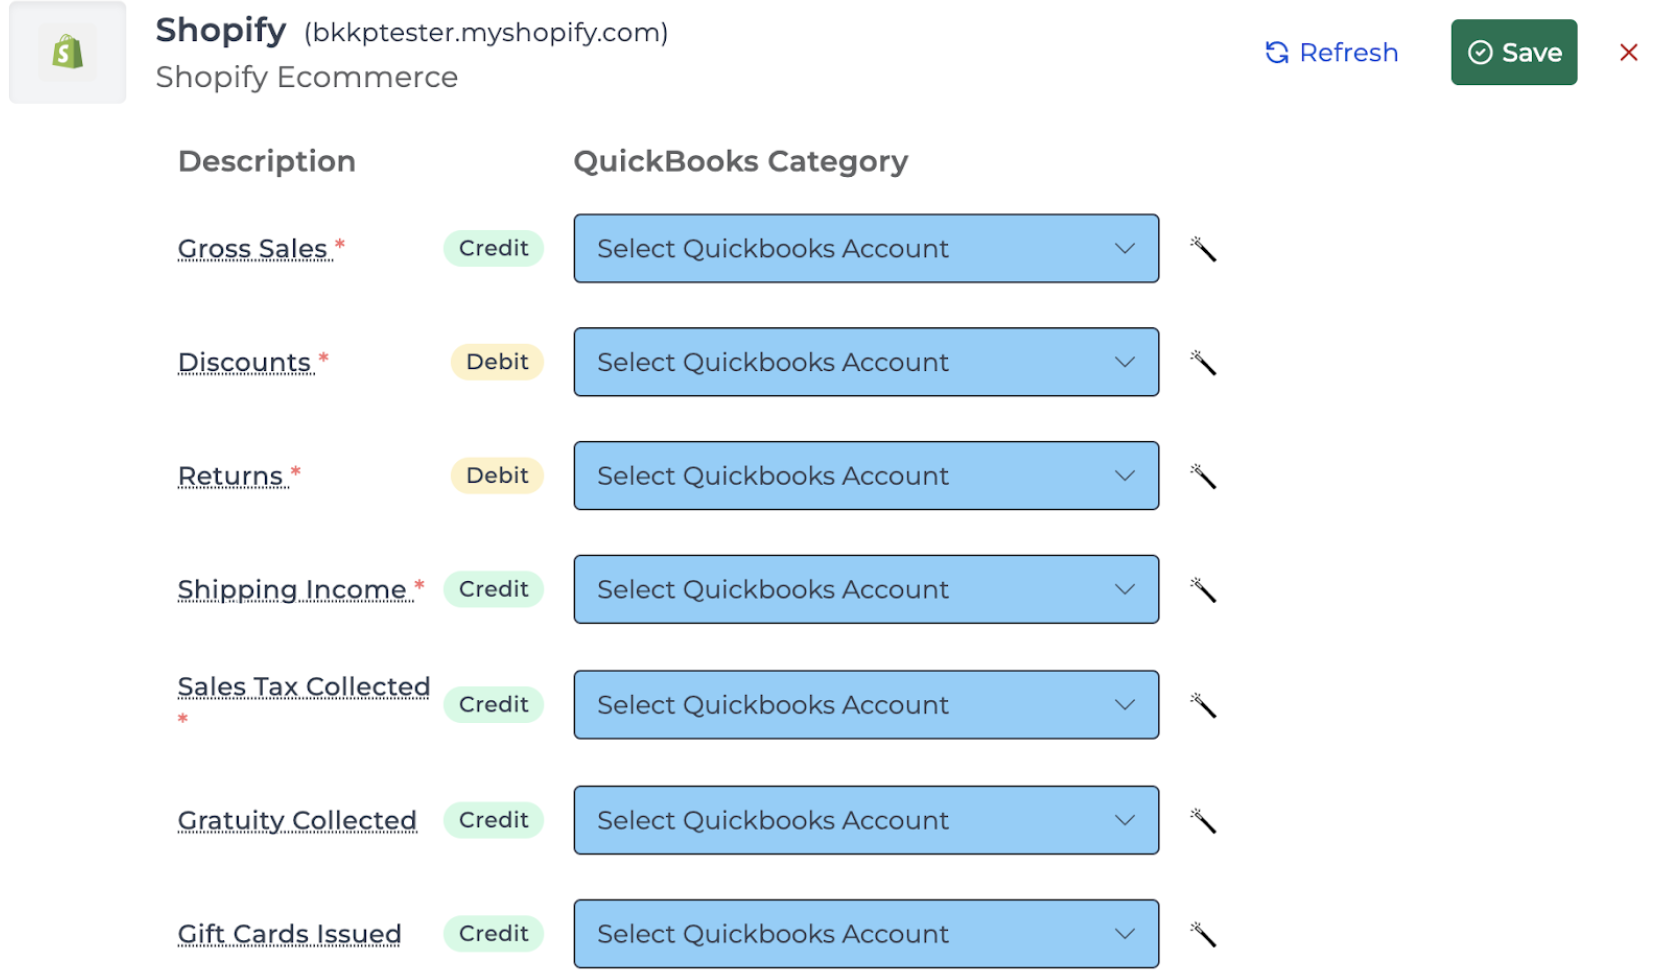
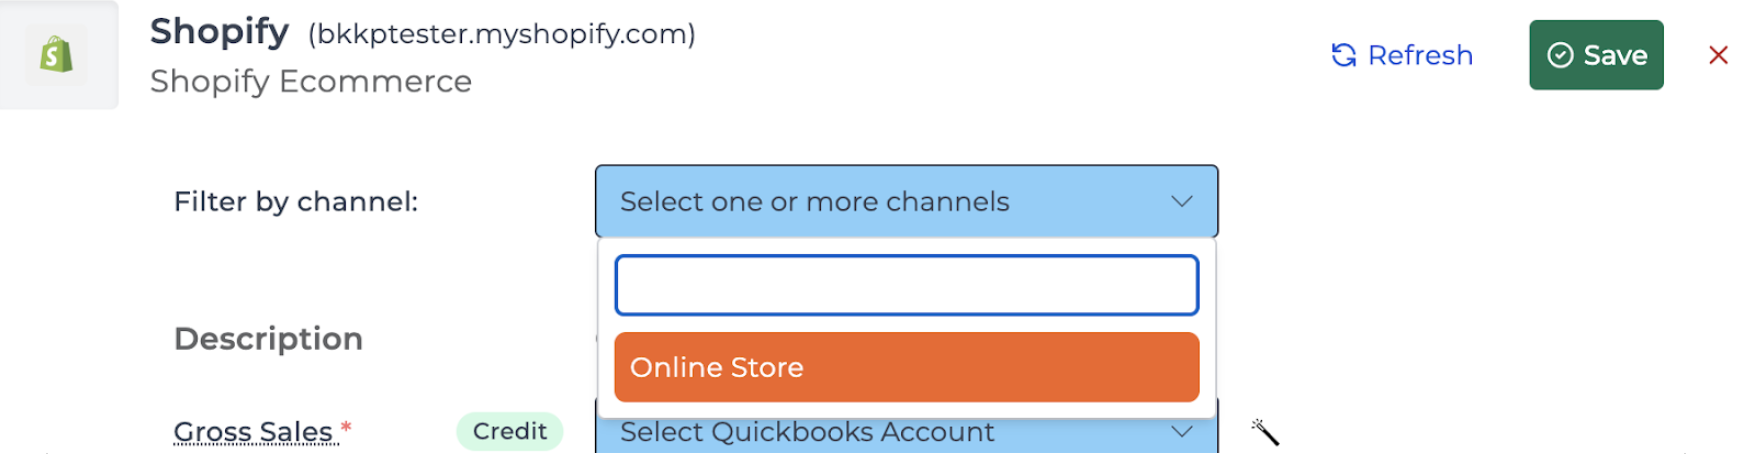
When configuring mappings at the non-parent segment level (for those who activated the “Segment by sales channel” feature discussed earlier), you’ll notice a “Filter by channel” dropdown at the top of the mapping view. This dropdown allows you to select one or multiple sales channels or POS locations to include in that specific segment. You can create as many “Segment by sales channel” configurations as needed to post different channels separately into your accounting platform.
11. Finalize and Automate
Once all journal entry templates are mapped and activated, Bookkeep will start posting daily entries to your accounting platform beginning the next day.
New to Bookkeep? Start from the Shopify App Store
If you don't have a Bookkeep account yet, there's no entity to create a Connect Intent in. In that case, install directly from the Shopify App Store:
- Click Install on the Bookkeep listing and approve the app permissions.
- When Shopify asks whether you are a new or existing Bookkeep user, choose the new-user option and sign up.
- Verify your email, then create your Bookkeep organization and entity. Your store attaches to it.
- Continue with Step 6 above.
If you already have a Bookkeep account, don't use this path. Create the Connect Intent in Bookkeep first, as described in Step 2.
If you have any questions about setting up your Shopify connection or mapping, please contact support@bookkeep.com.